


CMS in Everyday Dentistry: How to Create a Strong Temporary Bridge
Looking to up your temporary bridge game?
 The true value of a Dental CE course is most apparent in how it meshes with the real world. What would be the point of learning endlessly if it didn’t translate to real results?
In this spirit, Dr. Catalano has created a comprehensive explanation of a solid temporary bridge technique. We hope you’ll master it and make it work in your everyday dentistry!
by Dr. Chris Catalano, CMS Clinical Faculty
When Failure Is Not an Option
 Living in the Bay Area, I cross three bridges weekly. The most famous is the Golden Gate. It is an architectural and style masterpiece. It was built by an amazing generation of Americans in just over four years. It is strong and beautiful. When I think of my dental bridges that is what I want.
What about our temporary bridges? Holding the space for our permanent restoration is a must. Failure is not an option. We need the same qualities with these temporary materials but unfortunately they cannot do the job alone. The BisGMA temporary materials lack tensile strength. That is where we can use something borrowed from our construction friends to increase its strength: a material called Rebar.
Rebar You Can Find in Any Dental Office
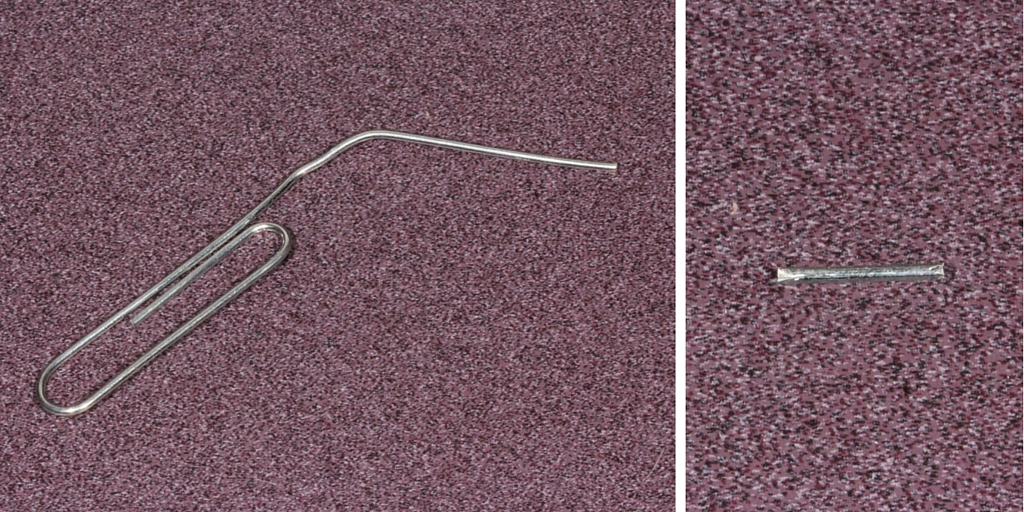 Rebar is short for reinforcing bar. It is a steel reinforcing bar that is laid in concrete to increase the tensile strength. They lay it into a mesh-like arrangement and pour concrete around it. This steel reinforcing bar holds the concrete from breaking when it undergoes tension. Luckily we have a simple miniature version of rebar in all our dental offices: the paper clip. It is a steel wire that can mimic rebar and provide the strength for any temporary bridge. Just don’t call it a paper clip. Call it the steel wire or whatever you want.
Temporary Bridge Technique: Using Rebar to Your Advantage
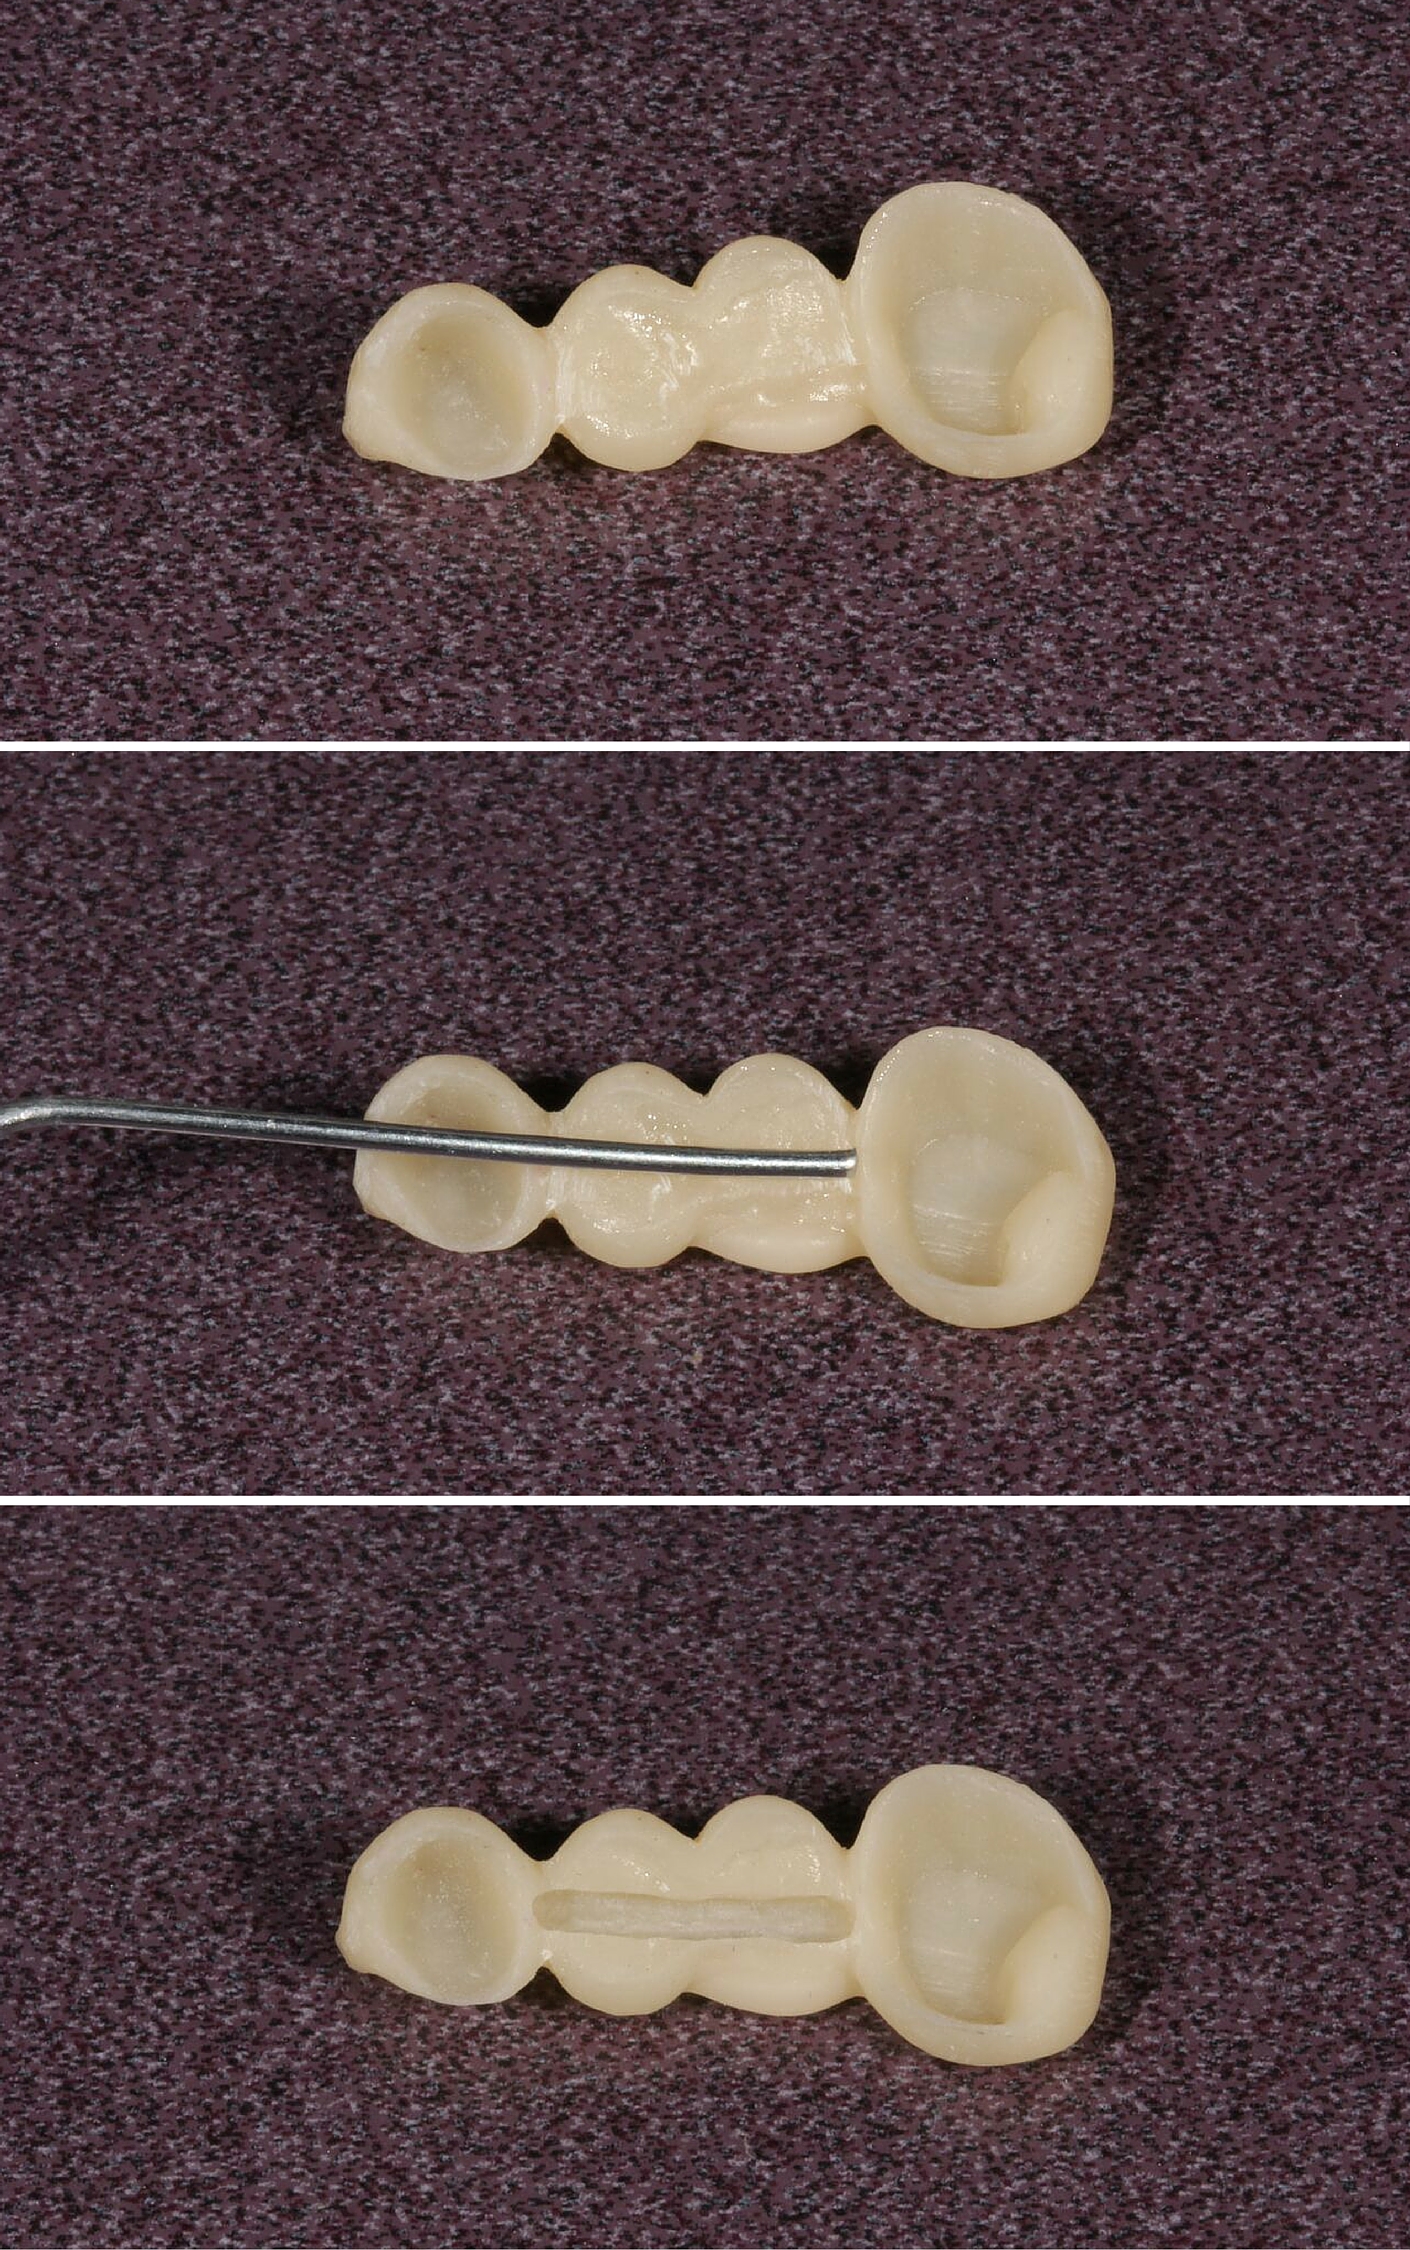 Make your temporary bridge out of your favorite BisGMA temporary product. Once you have finished fitting the bridge, unfold the paper clip, turn your bridge upside down or for anterior bridges, look at the lingual aspect.
Now measure the length by placing the tip of the paper clip from abutment to abutment. I usually score the spot with my handpiece where I am going to section it. You can also mark it with a pen. I use my handpiece to cut the wire. I essentially just cut it halfway and then I break it with my fingers by bending it at the cut mark. I use a diamond prep bur to do the trimming. When you break it the wire will have a rough edge. Round it with your bur.
Now that you have your wire, use that same prep bur and create a trough big enough to fit the wire. I go from prep to prep careful not to touch the margins of my temporary. Check to make sure your wire fits.
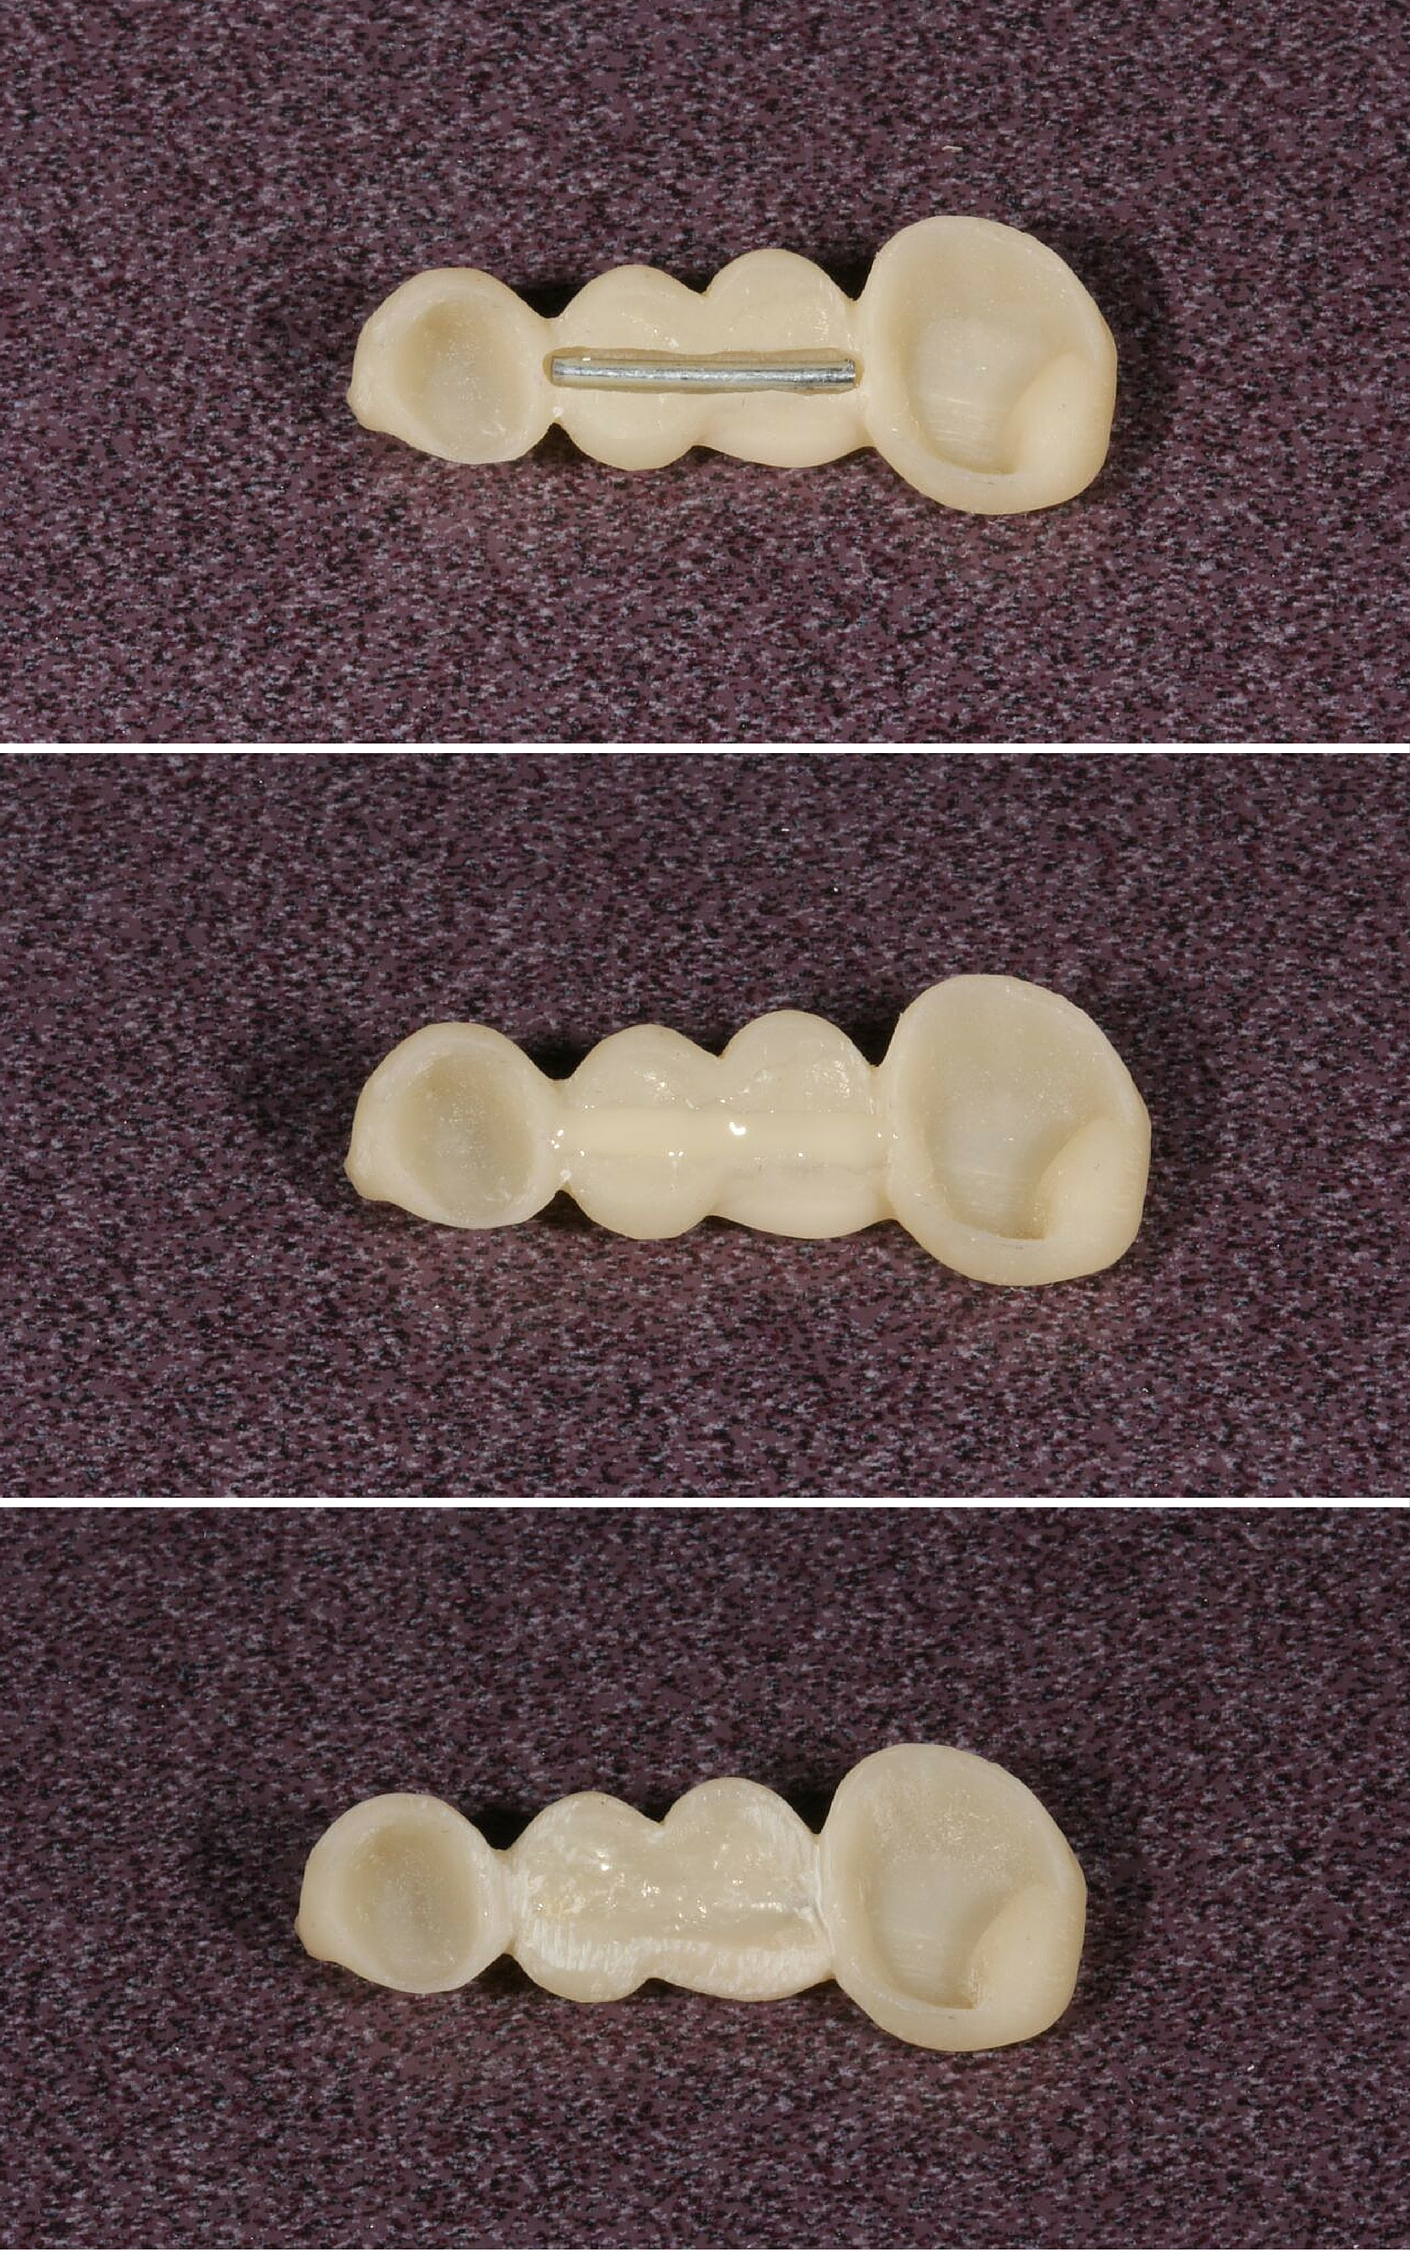 Clean and dry the trough of the temporary. Squirt a little flowable composite into the bottom of the trough. While the flowable is wet, lay your wire into the trough. I use a small condenser to push it to the bottom.
Next, go ahead and fill up the trough with the flowable and before curing it, seat it on the patient’s teeth. Make sure it is fully seated, then light cure the pontic area from occlusal, buccal, and lingual. Take the bridge off and light cure from the gingival. What you will see is any excess flowable will be adapted to the edentulous ridge. Trim any excess flash, sharp, or rough spots.
You are done! Your bridge is now a steel reinforced beauty.
Once you’ve used Dr. Catalano’s technique in your practice, let us know how it went in the comments!
Have your read Dr. Nosti’s series on ceramic porcelain fracture or Dr. Olitsky’s guide to the seven violations of smile design? These posts will help you incorporate Clinical Mastery into your everyday dentistry,

Download Your Copy


