Tips for Exquisite Intra-Oral Photography
by Jason Olitsky
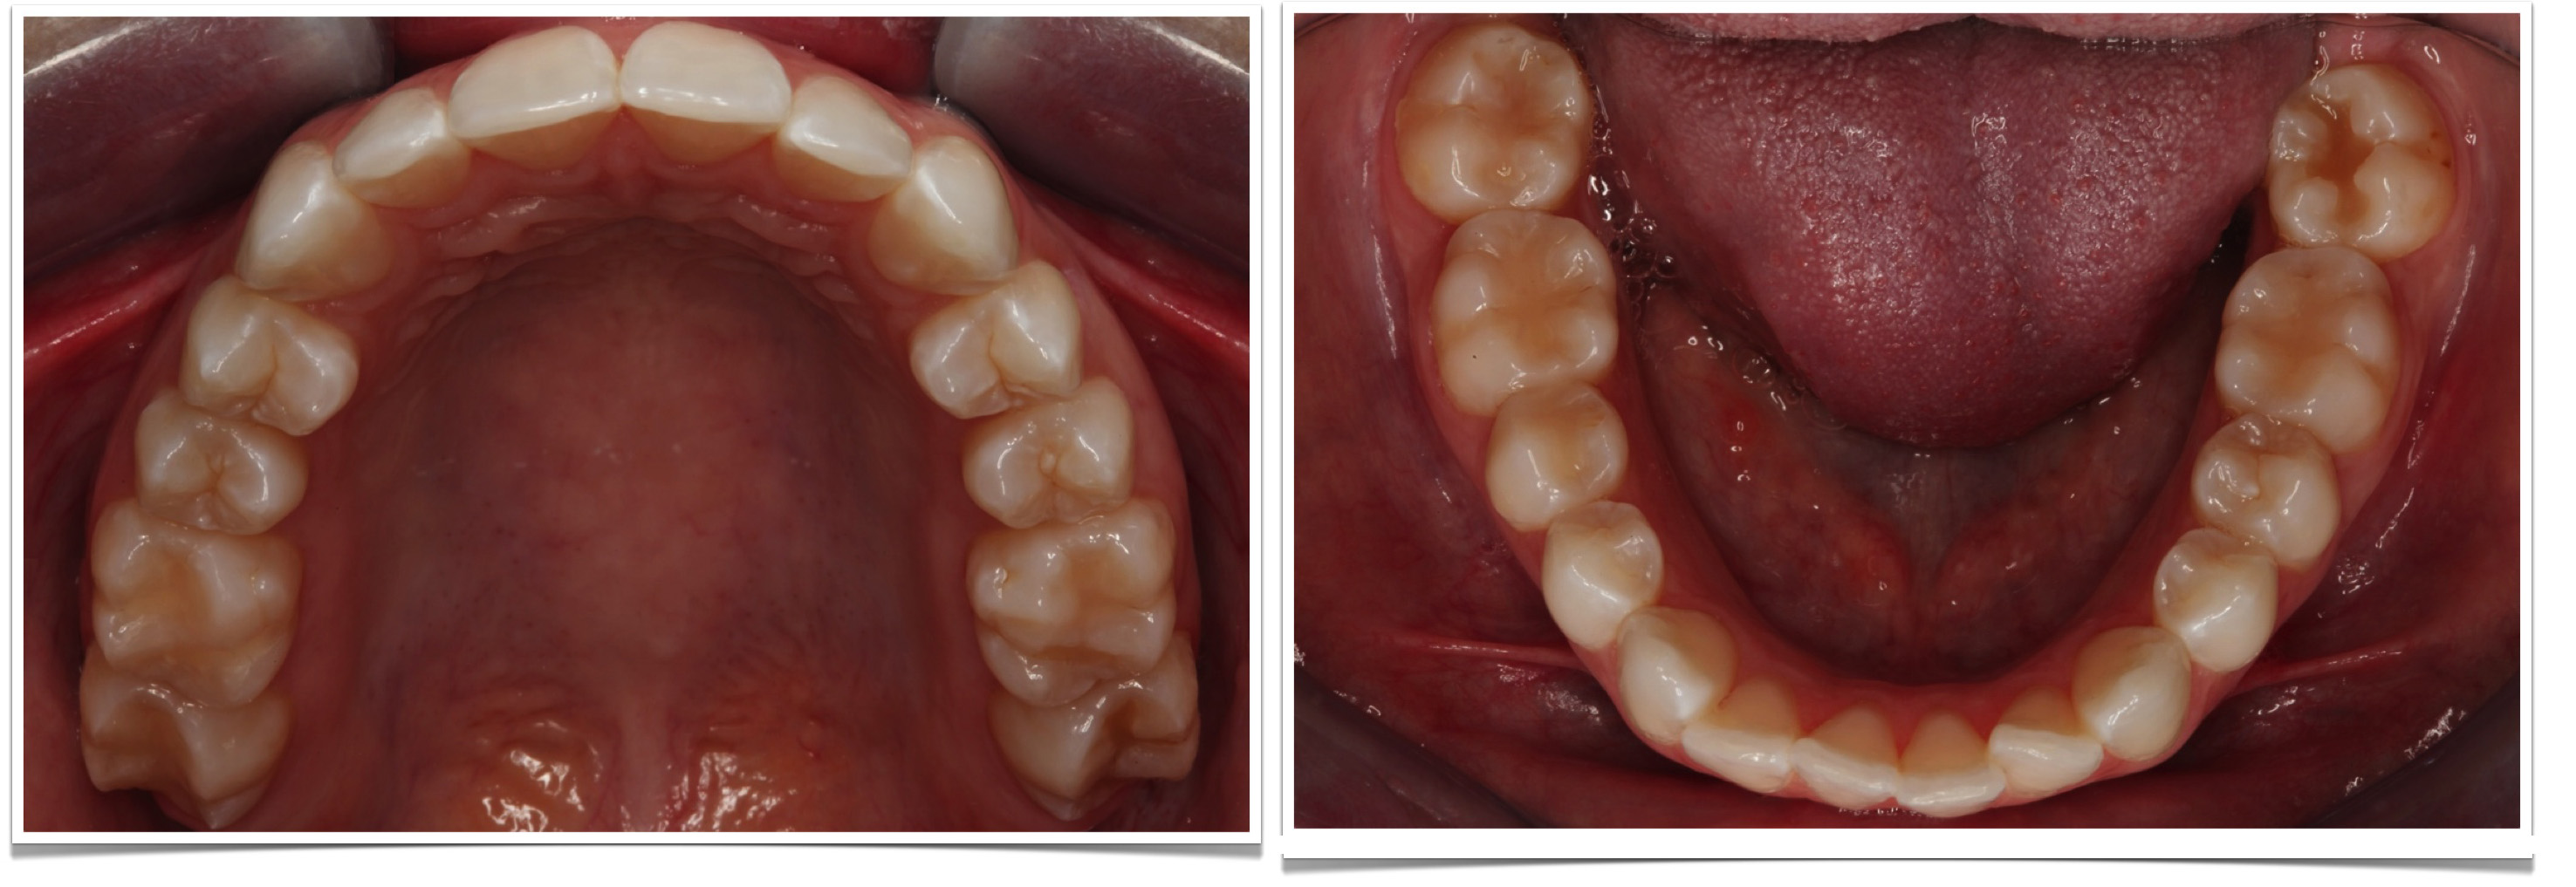
One of the most difficult shots to get in the intra-oral series is the retracted occlusal shots using mirrors. These images are critical in restorative treatment planning, evaluating arch form, and seeing the occlusal surfaces of teeth. Both images are really a “must have” for detailed treatment planning and appropriate case documentation.
The key to this shot is having the right tools. The best retracted dental photography is achieved with either a Chromium or Titanium Occlusal Mirror – Ideal size is 2 7/8″ x 5 1/2″ which captures most full arches. (Can be purchased at Photomed.) The most common error in occlusal photography is using a mirror that cannot capture all the way back to the distal of the second molars or non reflected teeth are in the frame of the image.
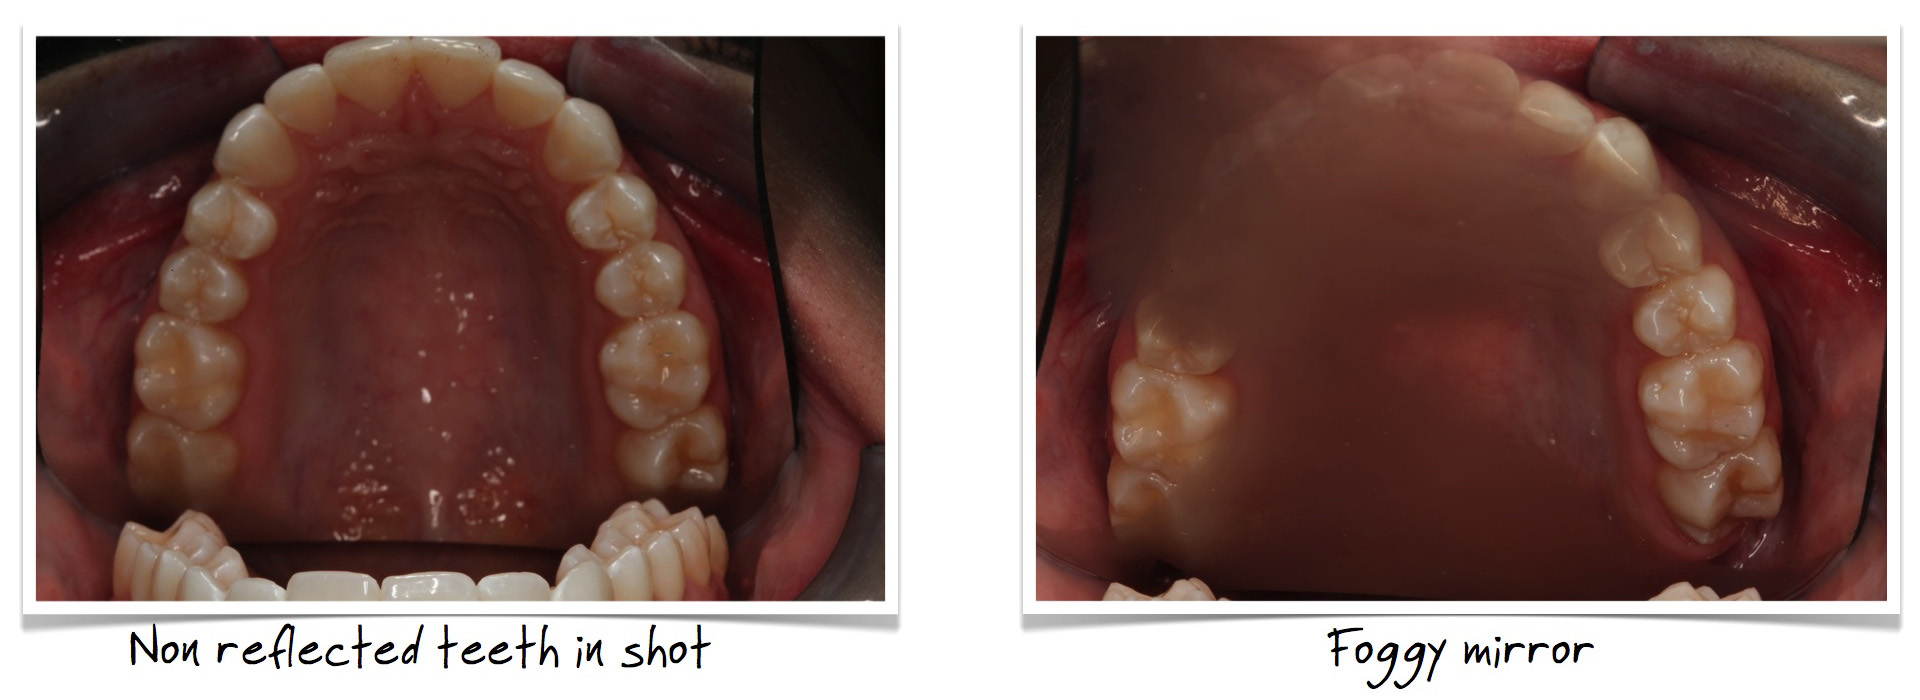
The second most common error is fogging. You can eliminate or reduce fogging by heating the mirrors in a warmer or running under hot water just prior to insertion. Customizing your retractors will also assist in manipulating the patient’s lips so that you can create a wide enough frame to insert the mirror.
On the mandibular and maxilliary arch. Use 1:2 (1:3 for crop sized sensors)
- Use retractors and intraotral mirror.
- Coat the patients lips in vaseline and get the retractors wet so they are easy to manipulate. Start the retractors on the bottom lip and rotate up. Position your retractors and have the patient hold in position. Rest the mirror against the opposing arch and ask your patient to breath through their nose.

- Make sure facial and lingual surfaces of central incisors are visible.
- Frame the shot so that lips and mirrors edge is minimized and unreflected teeth or nose is not in the image.
- Tongue should not obscure teeth, make sure mirror goes far enough back in patients mouth.
- Angle the mirror at 45 degrees to allow lingual and facial surfaces to be seen equally
- Take image from either the back of the patient or from the front for best view.
- Focus on bicuspids for clear image
A great tip is to see the picture with your eyes, before you see it through the view finder of your camera. Insert the retractors and place the mirror in the mouth to see the perfect shot before lifting the camera to your eye. Repeat this process a few times to get used to the placement of the mirror in the mouth. When ready, place the mirror in the mouth, lift the camera up to your eye and take the picture. This method better trains the technician to take occlusal views, while minimizing time the mirror is in the mouth and reducing the time the heavy camera is lifted to the eye, while only supported by one hand. In many cases it feels like we are overwhelming our patients with retractors and mirrors. The best thing you can do is practice in capturing this shot quickly by utilizing team members to perfect this set up and create massive confidence in your dental photography. This can easily be done with one person, however initially having a helper chair side can assist in repositioning patient, mirrors and retractors.
Lastly, while I do not recommend keeping a neck strap on the camera, a hand strap is a nice piece of equipment to own for occlusal views. The weight of the camera becomes a concern when the operator only has one hand on the camera. This happens usually only during occlusal views, when the photographer is also holding the mirror. A hand strap gives the photographer a secure hold on the camera while taking the one handed shots.

Dr. Jason Olitsky shares tips and tricks like these and more in our 2 day hands on dental photography course The Art of Photography. This course will show you how to take and manage high quality digital or film photographs in promoting, documenting, evaluating and communicating the key elements of aesthetic dentistry and dental photography.


when taking an occlusal photo, do you have patient lying down, sitting up? Thanks!
Lying down and if you have an extra set of hands to blow air on mirrors and assist with retraction. Hope that helps. Check out our online photography course at online.clinicalmastery.com or this DentalTown CE course – https://www.dentaltown.com/onlinece/details/287/picture-perfect-clinical-photography-made-easy for more information.
Hi Dr. Jason,
Could you please elaborate on how to consistently have uniform cropping of my intraoral photographs? Do you use any guidelines or any specific software to achieve that uniformity?