“Missing Tooth….Found Smile” A Case Study
Read on for this fascinating “missing tooth” case study from Dr. Lee Ann Brady.
 The Missing Tooth Approach
Dental Implant Diagnosis and Treatment Planning – Patient History
The patient was a healthy 46 year old.
He presented after seeing the Oral Surgeon I work with, who he knew professionally with an emergency related to tooth #8.
The patient had endo and a post core on #8 secondary to a trauma as a child, the tooth was bonded for many years, then restored with a crown when he 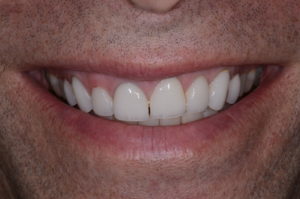 was in his 30’s. The upper arch from 4-13 had been restored with a combination of crowns and veneers by a local dentist 14 years prior.
The patient had noticed some stain at the gingival margins and was concerned about whether he should just deal with #8 or redo any of the other dentistry.
He also stated that he had never been “in love” with his anterior restorations, and wondered if he might make some esthetic changes
#8 was diagnosed with a root fracture and extraction and implant placement were recommended.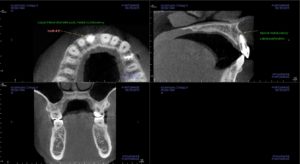
Diagnostic photos, impressions, kois bow and CR record were taken, along with completion of a comprehensive exam.
Joints were healthy, with no inflammation or disc issues.
Muscles – He had slight tenderness to palpation consistent with parafunction. His natural teeth displayed moderate to severe anterior edge to edge wear patterns from attrition.
After discussion of possible treatment approaches he decided to proceed with the extraction and implant, as well as replacement of the existing restorations from 6-11.
Resolving the Missing Tooth Issue
Dental Implant and Smile Treatment Sequence
 Using an initial wax-up, the existing restorations were removed from 6-11, and the crown of #8 was prepped off to the free gingival margin. A bisacryl provisional was fabricated with #8 as a pontic over the root and cemented temporarily.
An initial equilibration was accomplished to manage anterior guidance and prevent destruction of the temporary bridge
Using a CBCT, and final prosthetic positioning of #8 the implant positioned was determined to the fixture could be placed with the facial of the implant lingual to the final incisal edge position of the restoration.
#8 was removed and an immediate implant placed along with facial soft tissue and bone grafting to prevent development of a buccal concavity in the ridge and the temporary bridge recemented, over a custom healing cap to begin to hold the shape of the cull.
The implant site was allowed to heal for 3 months.
Final Steps in the Missing Tooth Case
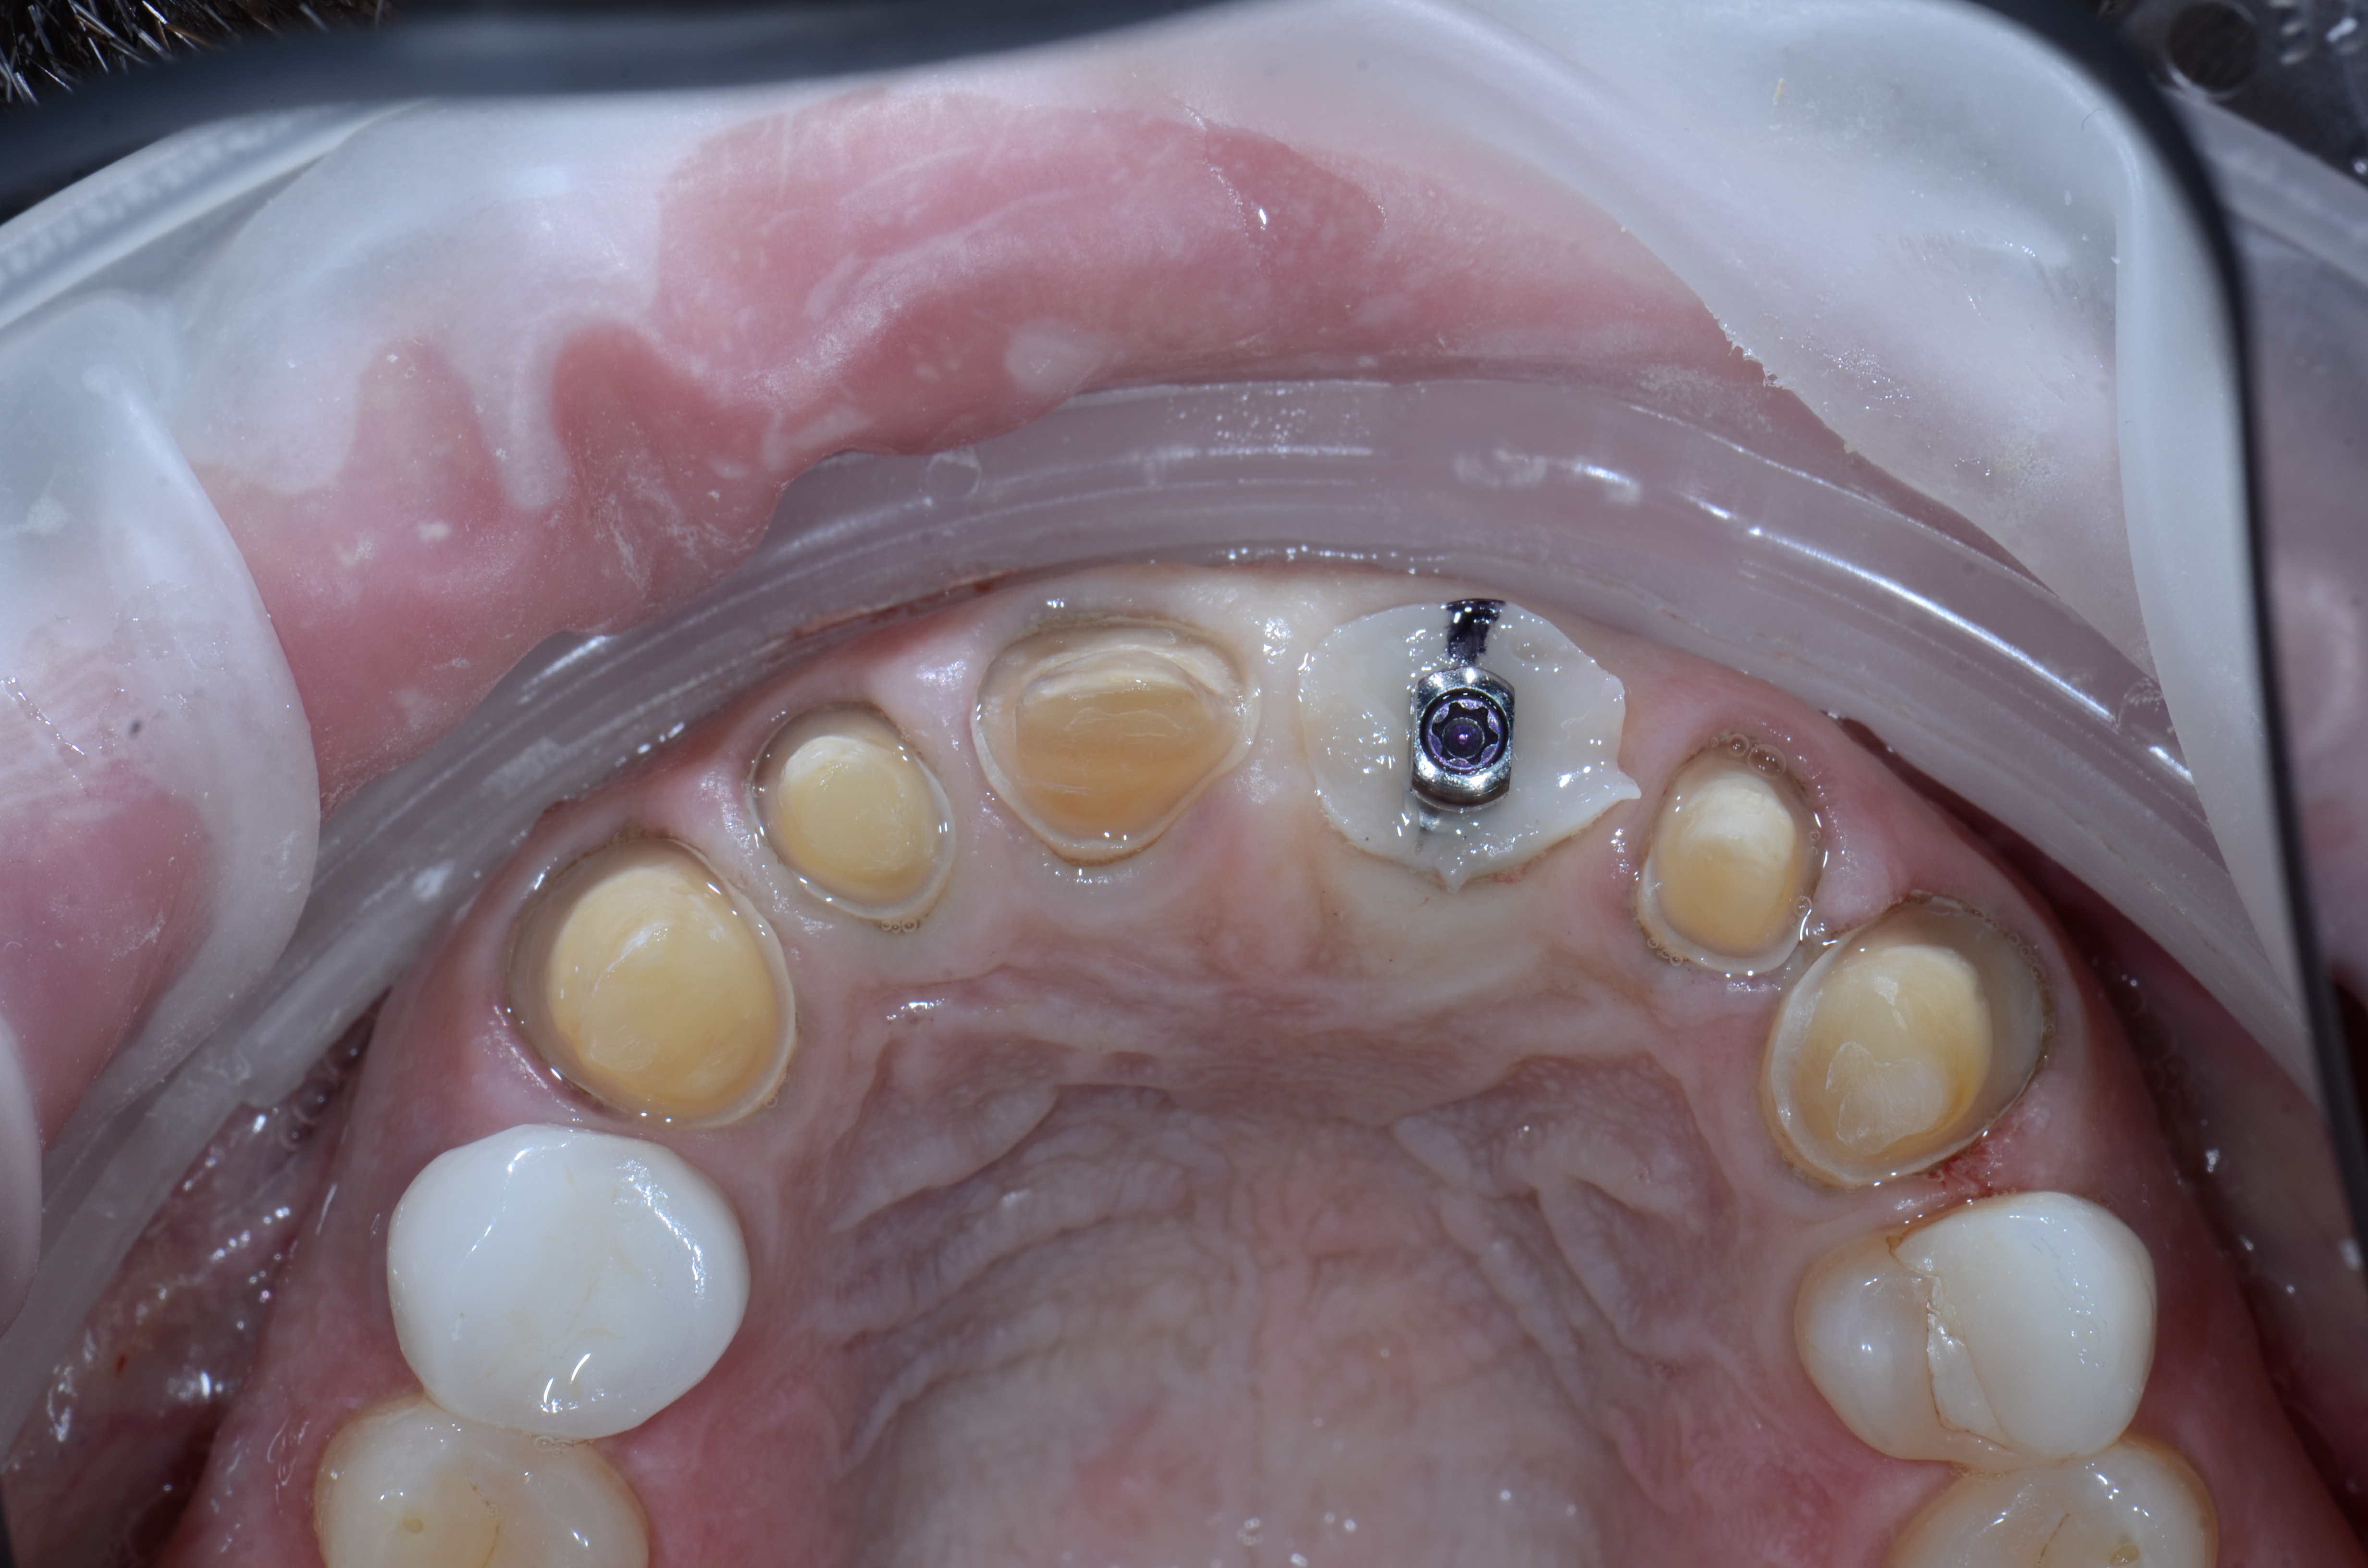
A fixture level impression, along with retracted impression of the natural tooth preparations was taken, along with shade information for fabrication of a screw retained/cemented implant provisional. The provisional was fabricated on an engaging temporary metal abutment to allow transfer to a custom impression coping when we were ready.
The temporary was tried in, seating verified using a radiograph, and tissue allowed to move around the abutment emergence profile with resolution of blanching in ten minutes. Initial free gingival margin position was evaluated in the temp and appeared to match #9. The temporary was cemented to the natural tooth abutments with Fynal and the access hole sealed with teflon tape and Telio. 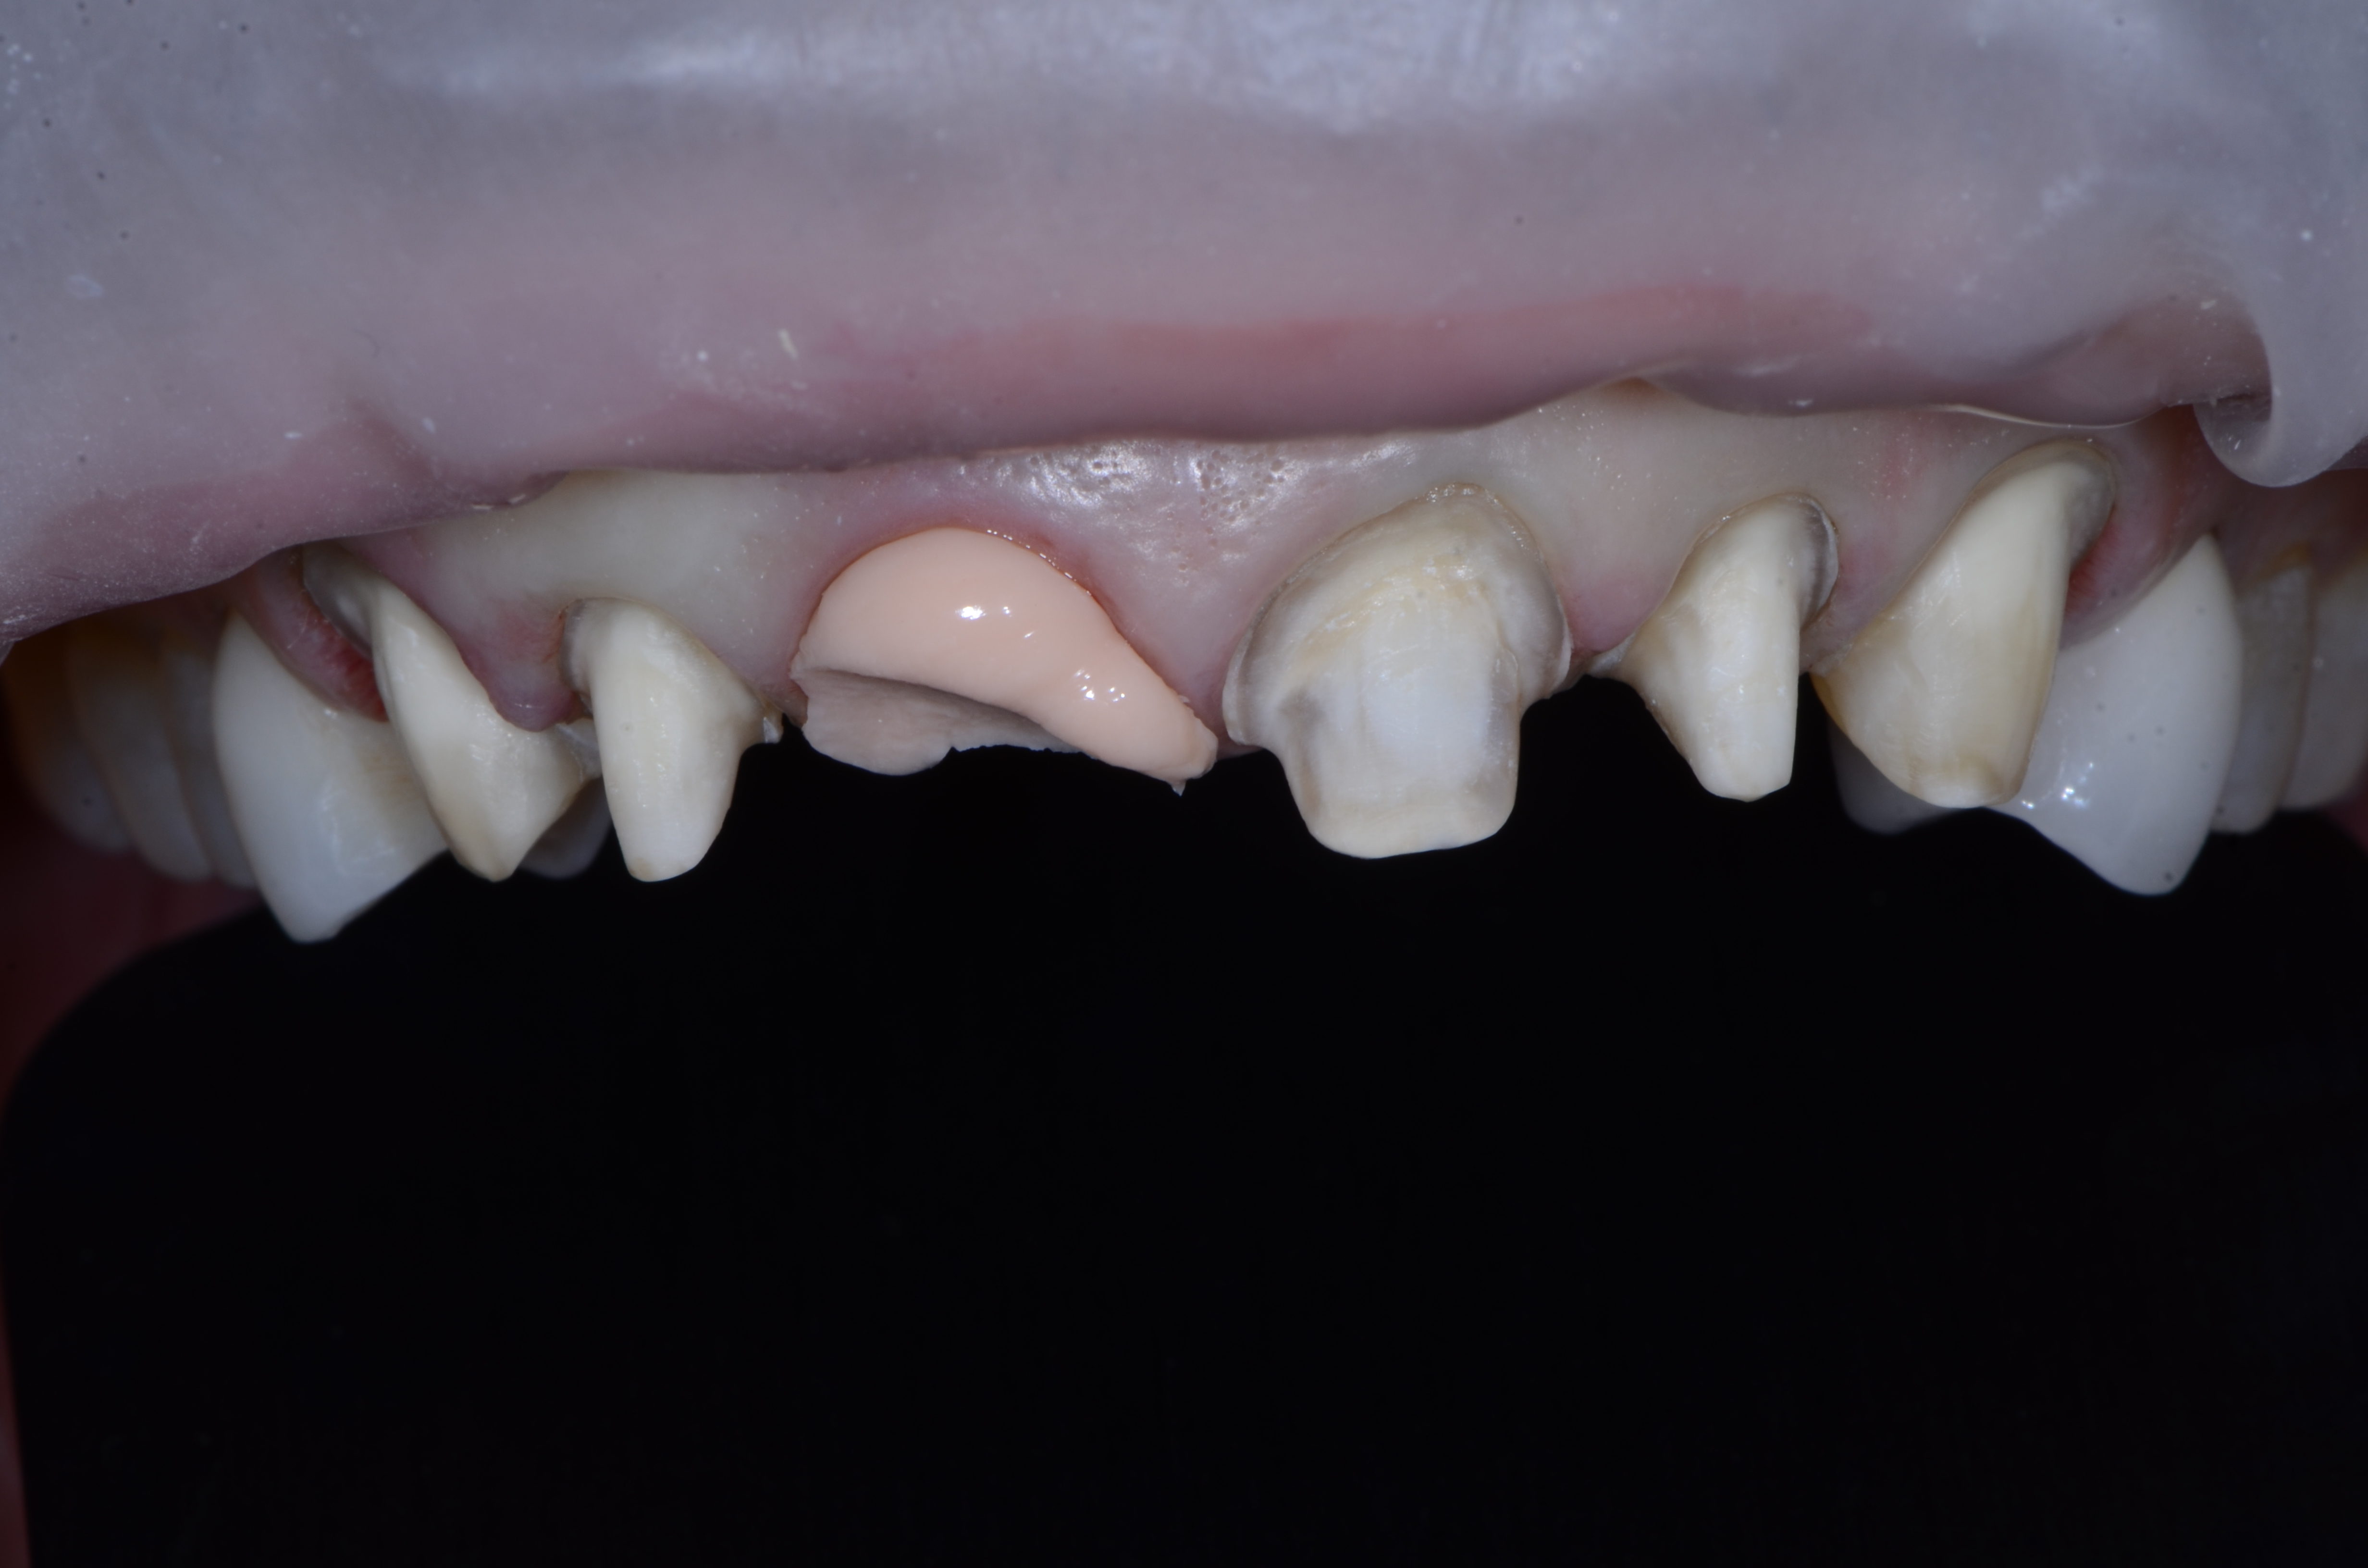


Free gingival margin position was evaluated at one month and determined to be positioned ideally, so no adjustment to the facial and inter proximal emergence profile was required.
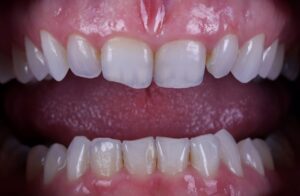
Ultimately the patient decided not to replace the premolar restorations and we proceeded with final restorative. A custom impression coping was fabricated to copy the emergence profile of the temporary, and placed for a final impression and lab records. #8 was restored with an max screw retained abutment/crown restoration.
The remaining teeth were restored with single emax units. The patient was equilibrated and edge to edge position perfected at the final impression appointment when preps were polished and refined, and then verified at the seat appointment.
The patient fractured the onlay on #5 during the restorative phase, so we prepped this tooth and placed an emax onlay.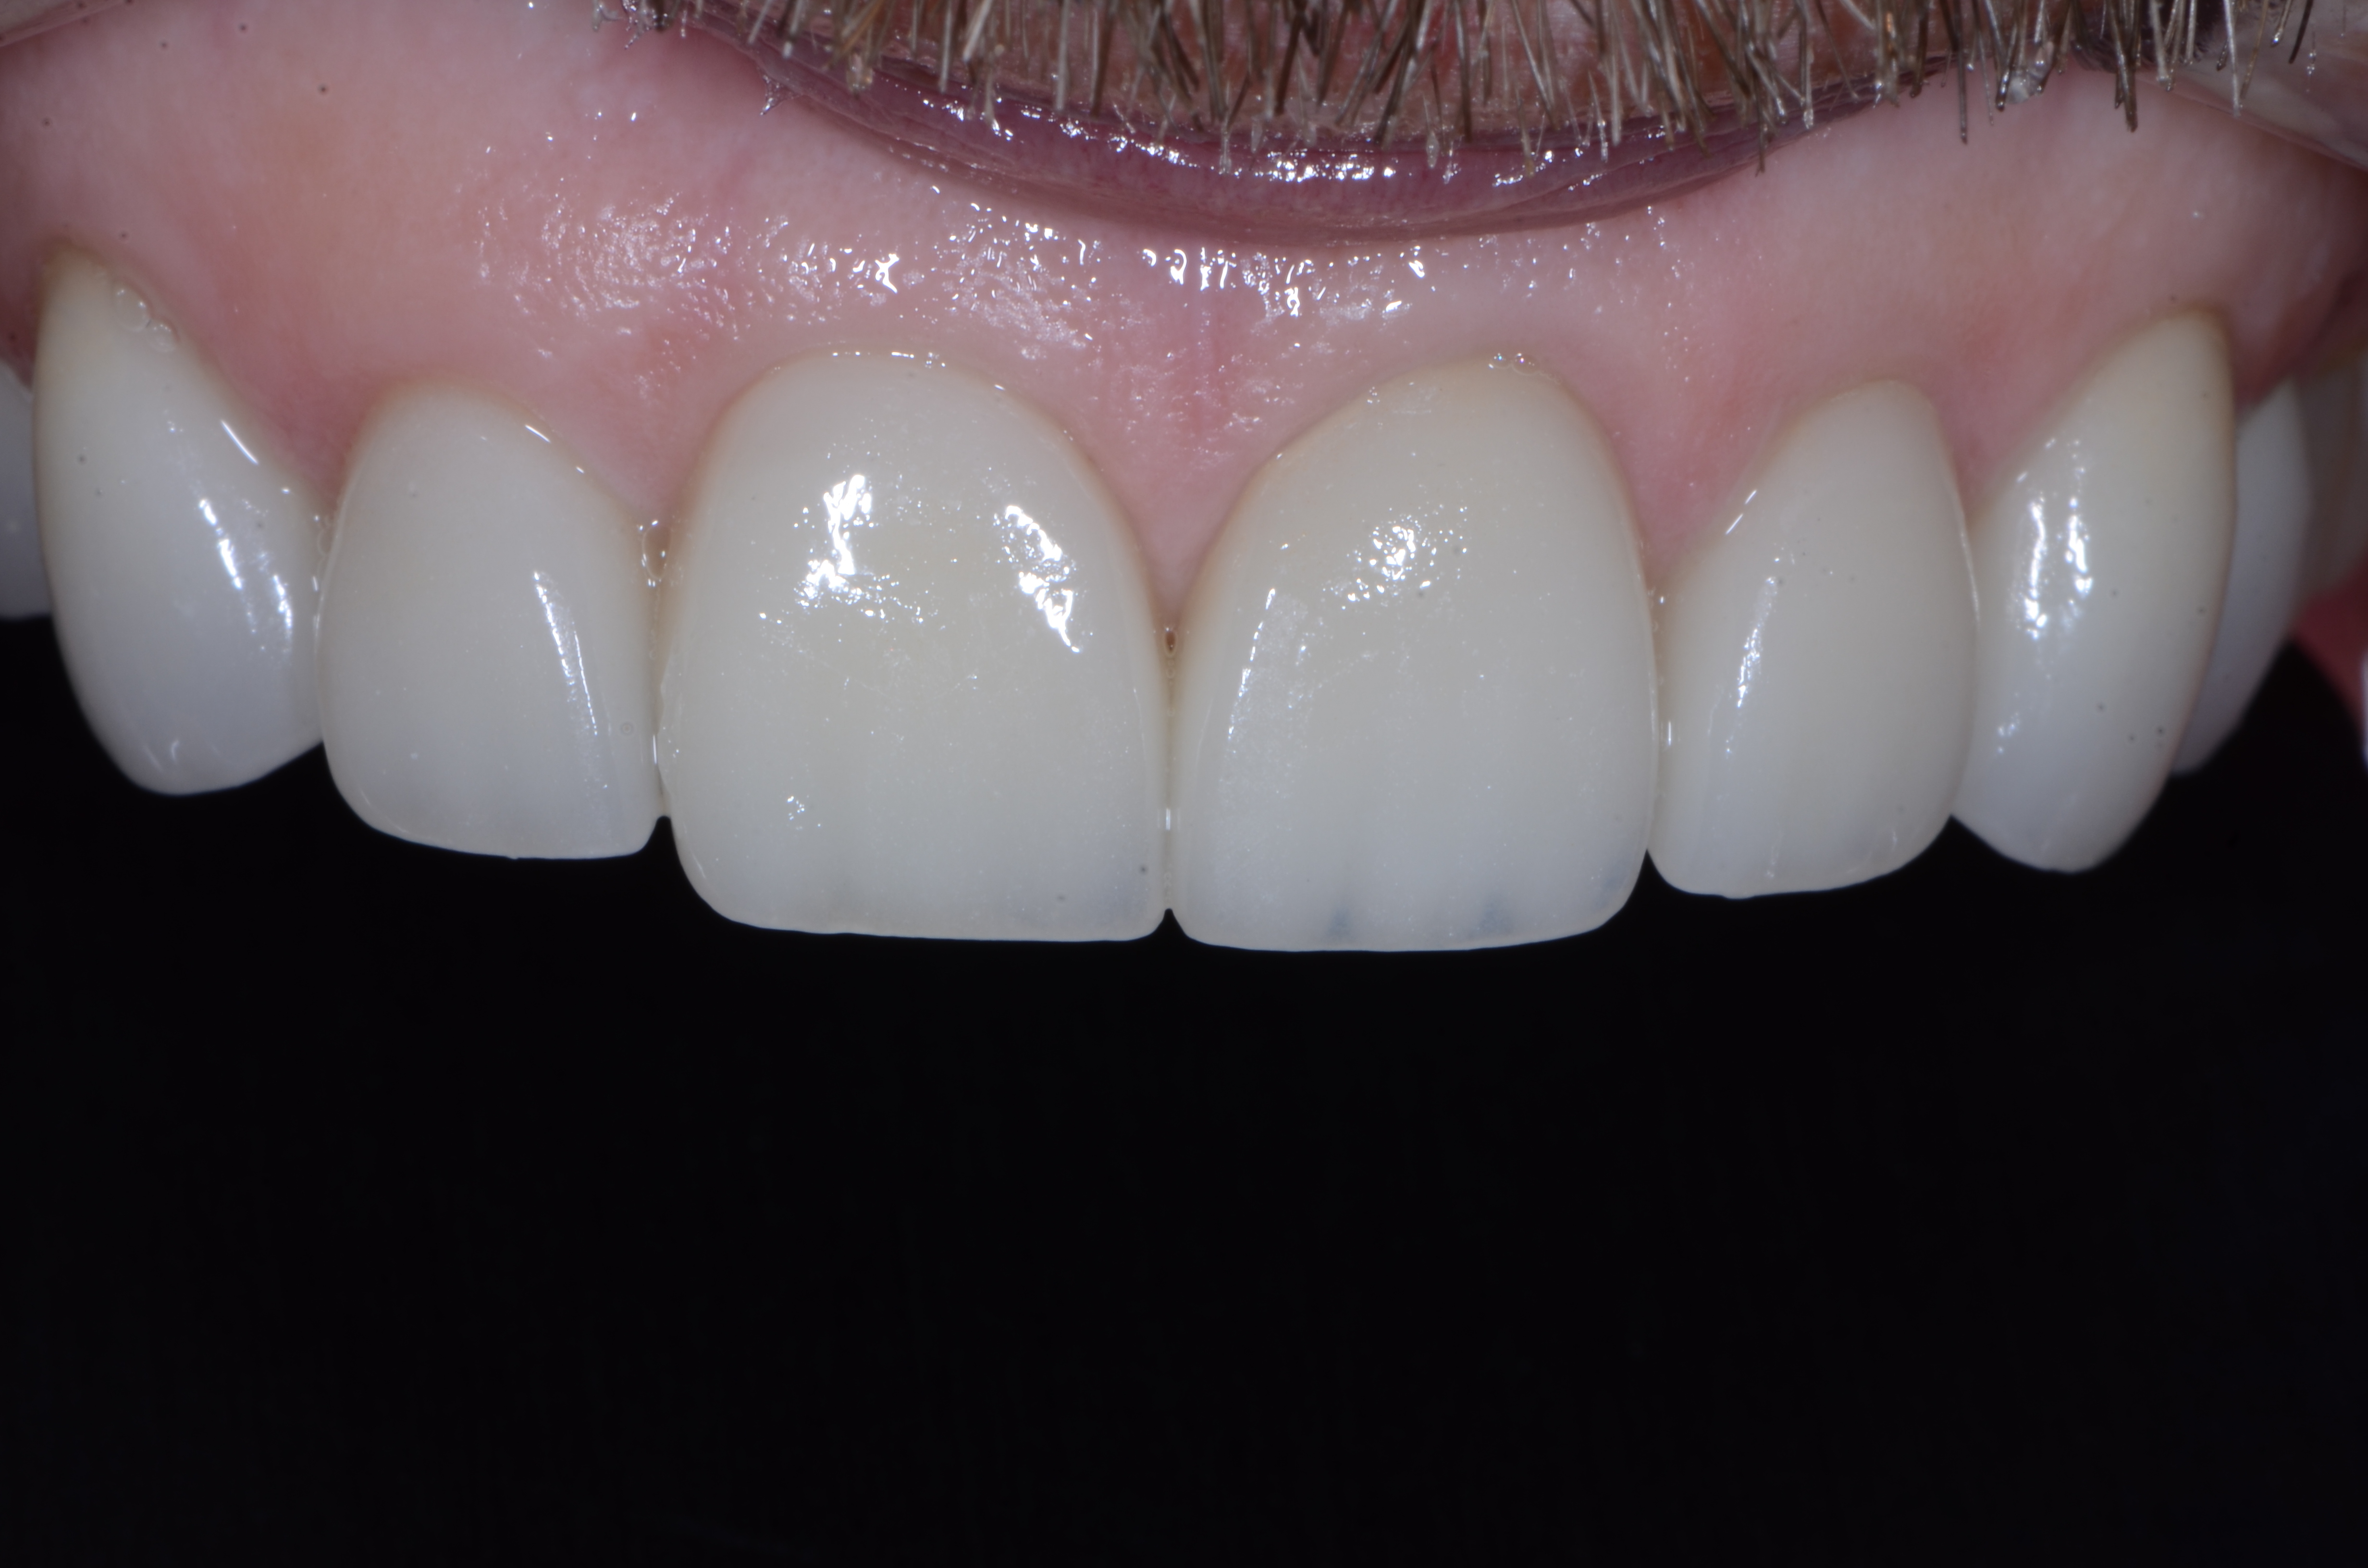
The final phase of care was impressions for a nighttime appliance to prevent damage due to parafunction.
Okay, questions? Join the conversation in the comments section!
Learn more about how Dr. Brady treats patients requiring implants at Mastering Implant Aesthetics LIVE in the Op on May 5 ,6 2017 in Glendale, Arizona.


Really nice case! The new look is more “masculine” as well! How does the bone buccal to the implant long term?
I expect we will have very stable bone long term buccal to the implant. The implant was not placed in the extraction site, but lingual to it. The buccal bone will resorb to the facial level of the bone mesial and distal to this tooth root over time. In order to make sure the implant stays in the bony housing we place the facial of the fixture lingual to this point. The buccal esthetics to avoid a concave appearance is managed with tissue grafting. Placing the fixture to the lingual (facial of the fixture should be lingual to the incisal edge of the final restoration) also ensures we can do a screw retained restoration.
Nicely planned and executed Lee Ann.
For those that may not know, can you review how you made your custom impression coping, with a lab analog and impression material to create the resin on an impression coping?
Can you also go over if you have to make adjustments on the temporary, what you look for and whether you decide to add material on the gingival or remove?
Thanks